Always Here for Advice
How to Trim Pottery on a Wheel: A Beginner’s Step-by-Step Guide
Ever turned a promising pot into a wobbly disaster? Beginner Pottery Wheels make learning the basics easier, but trimming is the secret to smooth, professional pottery! The short answer: centre your leather-hard piece, use sharp tools, and carve carefully. Learning this skill takes patience, but beginners who master it unlock sleeker shapes, balanced bases, and pottery perfection. Keep reading for expert tips!
How to Trim Pottery on a Wheel: A Step-by-Step Guide
Trimming pottery is where the magic happens. It’s the difference between a lumpy, rough shape and a refined, elegant piece.
But how do you do it right? Whether you're a beginner or levelling up your pottery game, this guide walks you through the process—step by step.
Understanding Pottery Trimming

What is Trimming?
Definition and Purpose
Trimming is the art of refining a wheel-thrown pot by shaving away excess clay once it’s reached a leather-hard stage.
It sharpens details, creates a foot ring, and ensures your pottery looks professional.
Refining Shape and Removing Excess Clay
Trimming isn't just about looks—it improves function, too. Uneven walls can lead to cracking or instability. By carefully removing extra clay, you create balance, symmetry, and durability.
Trimming-friendly clays vary by firing range — our guide on pottery wheel and clay pairings explains which earthenware and stoneware bodies trim cleanest at leather-hard.
Why Trimming is Important
Aesthetic Improvements
Ever noticed how some handmade pottery looks sleek and polished while others look, well, a bit lumpy? Trimming is the secret.
It defines crisp lines, removes imperfections, and gives each piece a clean, intentional design.
Functional Benefits (Stability & Even Drying)
A well-trimmed pot dries evenly, preventing warping and cracks. The foot ring also improves stability—essential for mugs, bowls, and vases that need to sit flat without wobbling.
Tools Needed for Trimming
Essential Tools for the Job
|
Tool |
Purpose |
|
Removes clay smoothly and efficiently. |
|
|
Rib Tool |
Helps refine shapes and smooth surfaces. |
|
Needle Tool |
Marks guidelines and fine details. |
|
Sponge |
Keeps clay slightly moist for smoother trimming. |
|
Calipers (Optional) |
Ensures even wall thickness, great for lidded pots. |
Other Essentials
-
Pottery Wheel – A steady, well-maintained wheel is key for precision.
-
Water – Just a small amount prevents clay from drying too fast.
Preparing Your Pottery for Trimming
Finding the Right Clay Dryness
Testing for Leather-Hard Stage
Press your fingertip into the clay. If it leaves a light mark without sticking, you're good to go.
Too soft? It’ll collapse under the tool. Too dry? It'll chip and crack.

Centering the Piece on the Wheel
Using the Wheel’s Ribs as a Guide
Place your piece upside down and spin the wheel slowly. If it wobbles, adjust its position until centred.
Securing the Piece with Clay or a Bat
Use small clay coils to anchor the piece, or work on a foam bat for extra grip. A secure hold makes trimming much easier.
Step-by-Step Trimming Process
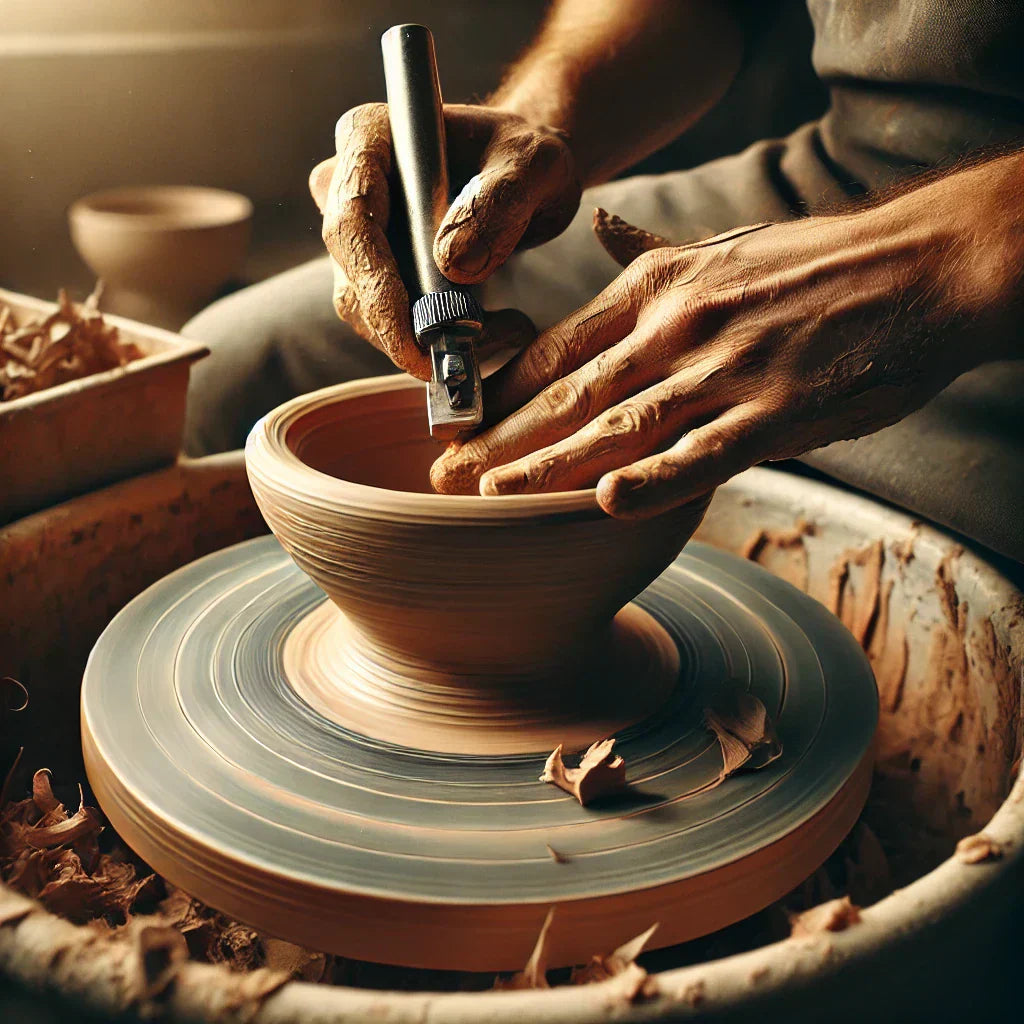
Creating a Foot Ring
Using a Trimming Tool to Define the Foot
Mark a rough guide with a needle tool, then begin carving out the foot ring with a loop tool.
Establishing the Foot Ring’s Depth & Width
Aim for a well-proportioned foot. Too deep, and it weakens the base; too shallow, and it won’t elevate the piece properly.
Trimming the Outside Walls
Holding the Tool at the Correct Angle
Hold the loop tool at a 45-degree angle and apply light, steady pressure.
Removing Excess Clay Evenly
Work in slow, controlled motions around the pot—rushing leads to gouges and uneven walls.
Trimming the Bottom
Smoothing and Shaping the Bottom Surface
Once the foot ring is defined, gently trim the centre bottom for a seamless finish.
Checking for Evenness
Run a fingertip across the base. If you feel bumps or ridges, refine it with light strokes.
Refining Shape and Details
Using Different Trimming Tools for Specific Areas
-
Loop tools – For deep, broad cuts.
-
Rib tools – For subtle shaping.
-
Needle tools – For fine detail work.
Smoothing with a Sponge
A slightly damp sponge helps blend and soften any rough areas for a polished finish.
Finishing Touches and Best Practices
Smoothing and Cleaning
Using a Sponge to Smooth Surfaces
A final wipe with a damp sponge removes tiny rough spots and gives the piece a clean, professional look.
Removing Clay Shavings
Brush away loose trimmings before they dry onto your pot.
Checking for Even Wall Thickness
Using Calipers (Optional)
Measure different areas to ensure even thickness—especially important for lidded pieces.
Ensuring Even Drying
Cover loosely with plastic to prevent moisture loss from one side drying faster than the other.
Avoiding Common Trimming Mistakes
Preventing Gouges & Uneven Surfaces
-
Use light, controlled pressure.
-
Trim in small layers rather than taking off too much at once.
Keeping Tools Sharp
Dull tools can drag and tear clay, creating rough edges. Keep them sharp for cleaner cuts.
Comparison: How Effective Are Different Trimming Tools?
Here’s a quick look at how different trimming tools perform based on precision, ease of use, and finishing quality:
📊 Trimming Tool Effectiveness
|
Tool |
Precision 🎯 |
Ease of Use 👍 |
Finishing Quality ✨ |
|
Loop Tool |
★★★★★ |
★★★★☆ |
★★★★★ |
|
Rib Tool |
★★★☆☆ |
★★★★★ |
★★★★☆ |
|
Needle Tool |
★★★★★ |
★★★☆☆ |
★★★☆☆ |
Frequently Asked Questions
How long should clay dry before trimming?
Most pots are ready to trim once they reach the leather-hard stage, which usually takes around 12 to 24 hours depending on the clay body, the thickness of the walls, and the humidity in your studio. The clay should feel cool and firm and hold its shape, but still be soft enough to carve cleanly without crumbling.
How do you know when a pot is ready to trim?
A pot is ready to trim when it is leather-hard: press a fingernail into the base and it should leave a mark without the clay sticking to your finger. If the clay still feels wet and tacky it is too soft and will distort on the wheel; if it has gone bone-dry and pale it is too hard to trim safely and may chip.
How do you trim a foot ring on a bowl on the wheel?
Centre the bowl upside-down on the wheelhead (a chuck or pads of clay help hold it steady), then turn the wheel slowly and use a loop trimming tool to carve away the excess clay from the base. Define the outer and inner edges of the foot ring first, then refine the recess in the middle, checking the wall thickness as you go so you do not trim through the bottom.
What tools do you need to trim pottery on a wheel?
The essentials are a loop or ribbon trimming tool to remove clay, a needle tool to check wall thickness, and a sponge to clean up. A chuck or extra bats can help hold awkward shapes in place while you work. You will find the full range in our pottery tools collection.
Final Thoughts
Mastering pottery trimming is a game-changer. It takes patience and practice, but once you’ve got the hang of it, you’ll see a dramatic improvement in your work.
Start with simple shapes, experiment with different tools, and refine your technique with each piece. Before long, you’ll be trimming like a pro—turning rough clay into smooth, gallery-worthy pottery!